Blood Specimens: Chemistry and Hematology

(See specific Microbiology Specimen sections for additional instructions.)

Blood Components

In the average adult male there are approximately 5 quarts (4.75 liters) of blood, composed of about 3 quarts (2.85 liters) of plasma and 2 quarts (1.9 liters) of cells.

Blood cells are suspended in the plasma, which is made up of water and dissolved materials, including hormones, antibodies, and enzymes that are being carried to the tissues, and cellular waste products that are being carried to the lungs and kidneys.

The major blood cells are classified as red cells (erythrocytes), white cells (leukocytes), and platelets (thrombocytes).

The red cells are delicate, round, concave bodies that contain hemoglobin, the complex chemical that transports oxygen and carbon dioxide.

Hemolysis occurs when the thin protective membrane that encases the fragile red cells is ruptured, allowing hemoglobin to escape into the plasma. Hemolysis can be caused by rough handling of a blood specimen, leaving the tourniquet on too long (causing blood stasis) or squeezing the tip of the finger too hard during capillary collection, dilution, exposure to contaminants, extremes in temperature, or pathologic conditions.

The primary purpose of the white cells is to fight infection. In a healthy person, the white cells respond to minor infections by increasing in number and eliminating pathogens. Platelets are small fragments of special cells that aid in blood clotting.

Either plasma or serum may be separated from the blood cells by centrifugation. The essential difference between plasma and serum is that plasma retains fibrinogen (the clotting component), which is removed from serum.

Serum is obtained from clotted blood that has not been mixed with an anticoagulant (a chemical that prevents the clotting of blood). This clotted blood is then centrifuged, yielding serum, which contains two types of protein: albumin and globulin. Serum is usually collected in mottled red/gray, gold, or cherry red-top tubes, and red-top tubes are occasionally used.

Plasma is obtained from blood that has been mixed with an anticoagulant in the collection tube and has, therefore, not clotted. This mixed blood may then be centrifuged, yielding plasma, which contains albumin, globulin, and fibrinogen.

There are numerous coagulation factors (factor VIII, factor IX, etc) involved in the clotting of blood. Several different types of anticoagulants interfere with the activity of these factors to prevent clotting. Both anticoagulants and preservatives may be required for plasma specimens. The specified anticoagulant or preservative must be used for the test ordered. The chemical has been chosen to preserve some feature of the specimen and to work with the method used to perform the test. Blood collected with one anticoagulant suitable for the test described may not be considered suitable for other tests. Because additives are not interchangeable, it is necessary to consult the specimen requirement field of individual test descriptions to determine the appropriate collection requirements for the test ordered.

Blood Collection / Transport Containers

Following the collection, preparation, and transport instructions suggested by Labcorp supports the best possible test results. Materials for proper specimen collection and transport are supplied by Labcorp. Note: Specimens to be tested by Labcorp should be collected in specimen containers provided by Labcorp.

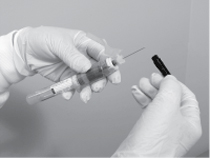
Anticoagulants and Preservatives. To ensure accurate test results, all tubes containing an anticoagulant or preservative must be allowed to fill completely. Attempts to force more blood into the tube by exerting pressure, as in collection with a syringe, will result in damage to the red cells (hemolysis). If the vacuum tube is not filling properly, and you are certain that you have entered the vein properly, substitute another tube. Occasionally, vacuum tubes lose their vacuum. If the specimen cannot be properly collected, select another site and using new, sterile collection equipment, collect the specimen. (Special note for light blue [sodium citrate] tubes used for coagulation studies: Always fully seat and hold the tube securely on the Vacutainer® hub while filling.)

Note: Use plastic transport tubes for all frozen specimens.

Specimen Containers

Note: Please examine specimen collection and transportation supplies to be sure they do not include expired containers.

Red-top tube: Contains no anticoagulant or preservative.

Use: Serum or clotted whole blood. Serum must be separated from cells within 45 minutes to two hours depending on the test(s). Please refer to the specimen requirements for the test(s) of interest available in the Directory of Services. Send serum in a plastic transport tube.

Mottled red/gray-top, gold-top, or cherry red-top (gel-barrier) tube: Contains clot activator and gel for separating serum from cells, but not anticoagulant. Do not use gel-barrier tubes to submit specimens for therapeutic drug monitoring. Always check the test description to determine whether a gel-barrier tube is acceptable.

Use: Serum, may be used for assays requiring serum unless otherwise stated. Separate serum from cells within within 45 minutes to two hours depending on the test(s). Please refer to the specimen requirements for the test(s) of interest available in the Directory of Services. Serum may be sent in the centrifuge tube with an intact barrier (correct separation upon centrifugation) between cells and serum or in a plastic transport tube. If specimen is centrifuged before clotting is complete, a fibrin clot will form on top of the cell. This finding is frequent in hemolyzed specimens. Also, the gel barrier may not be intact and could cause improper separation of serum and cells, possibly affecting test results.

Lavender-top tube: Contains K2 EDTA.

Use: EDTA whole blood or plasma. Send plasma in a plastic transport tube labeled “Plasma, EDTA.” Send whole blood in a lavender-top tube.

Gray-top tube: Contains sodium fluoride (a preservative) and potassium oxalate (an anticoagulant).

Use: Sodium fluoride whole blood or plasma. Send plasma in a plastic transport tube labeled “Plasma, Sodium Fluoride.” Send whole blood in a gray-top tube.

Blue-top tube (also light blue-top tube): Contains sodium citrate. Be sure to use only tubes with a 3.2% sodium citrate concentration. These are easily identified by the yellow diagonal stripes on the label.

Use: Sodium citrate plasma. Send plasma in a plastic transport tube labeled “Plasma, Sodium Citrate.” Send whole blood in a blue-top tube.

Green-top tube: Contains sodium heparin or lithium heparin.

Use: Heparinized whole blood or plasma. Send plasma in a plastic transport tube labeled “Plasma, Sodium Heparin” or “Plasma, Lithium Heparin.” Send whole blood in a green-top tube.

Yellow-top tube: Contains acid citrate dextrose (ACD) solution.

Use: ACD whole blood. Send whole blood in a yellow-top tube.

Royal blue-top tube: Contains sodium EDTA for trace metal studies. Some royal blue-top tubes do not contain EDTA.

Use: EDTA whole blood or plasma. Send whole blood in a royal blue-top tube. Send plasma in a plastic transport tube labeled “Plasma, EDTA from royal blue.”

Tan-top tube: Contains sodium EDTA for blood lead analysis.

Use: EDTA whole blood. Send whole blood in a tan-top tube.

Plasma Preparation Tube (PPT™): Contains EDTA.

Use: EDTA plasma for molecular diagnostic tests (eg, polymerase chain reaction (PCR) and/or branched DNA amplification (bDNA) techniques). Upon centrifugation, a gel barrier is formed between the plasma and the cellular components of the blood. The tube can be sent directly to the lab without transferring to a secondary tube. Plastic tubes can be frozen at -80°C without risk of breakage.

This section is presented as a guide for trained venipuncture technicians, or phlebotomists, and is not intended to train individuals in venipuncture technique. When drawing blood, please follow all venipuncture procedures recommended for use by recognized organizations and/or in accordance with applicable state regulations involving phlebotomy practices. The Clinical Laboratory Standards Institute (CLSI) is an excellent resource for additional information.

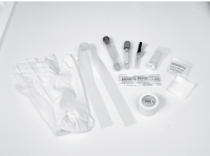
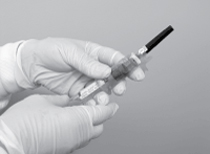
Assembling Supplies. Assemble the following supplies: lab coat, gloves, labels, safety needle, needle holder, tourniquet, appropriate tubes, gauze, alcohol sponge, adhesive strip, and sharps container. (See Figure 2.) Put on the lab coat and gloves. The aseptic method of collecting and transporting a blood specimen works on the principle of a vacuum tube for drawing blood. A double-pointed needle or multiple sample needle (both disposable) may be used for venipuncture. Ordinarily, a 21- or 22-gauge needle is used. A small bore, sharp needle causes minimum patient discomfort; 22- or 23-gauge is the smallest bore (or lumen) size recommended to avoid hemolysis. A needle length of 1 to 1½ inches permits an angle of entry that will not pierce both vein walls and enter tissue.

Specimen

Figure 2

When more than one blood specimen is required, multiple sample needles and vacuum tubes make blood collection simpler and more efficient. A tiny rubber sleeve automatically closes when the vacuum tube is removed from the holder, preventing leakage and loss of blood when the tubes are being changed.

Place the sharps container within reach. Open the single or multiple sample needle package in front of the patient; do not tear the paper seal for the needle's cap, and do not remove the needle's cap (sterile shield) at this point. (See Figure 3.)

needle

Figure 3

needle cap removed

Figure 4

Prepare the needle holder in order to attach the safety needle in the appropriate manner. Pull the safety shield on the needle back over the holder before removing the needle shield. Thread the needle into the holder and tighten it firmly. (See Figure 4.) Follow the manufacturer's recommendations on properly setting the needle. With some needle assemblies, you may slide the collection tube into the holder, carefully pushing the tubes forward until the needle touches the stopper. Gently tap tubes containing additives to dislodge any material that may be adhering to the stopper. Carefully push the tube forward until the top edge of the stopper meets the guideline on the holder. Let go. The tube will retract below the guideline. Leave it in that position. This step embeds the full point of the needle in the stopper without puncturing it, preventing blood leakage on venipuncture and the premature loss of vacuum.

During venipuncture, do not have the patient clench and unclench the fist repeatedly (“pumping”). This will cause a shift in fluid between the vein and the surrounding tissue. This can lead to changes in concentration of certain analytes. To facilitate making the vein more prominent, the patient may be asked to hold firmly to a rubber ball, a thick wad of gauze, etc. Also, never leave a tourniquet on the arm for more than one minute without releasing it. This can cause discomfort to the patient and may also cause hemolysis.

Preparing the Puncture Site. After securing the tourniquet and reaffirming your selection of the best vein, both by sight and palpation, proceed as follows. Note: If a patient has intravenous (IV) solutions going into one or both arms, it is acceptable to puncture the vein 3 to 4 inches below the site of the IV.

  1. Except when a blood alcohol is ordered, swab the site with a sterile alcohol sponge (70% alcohol) in a circular motion, inside to outside, to push contaminants away from the puncture site. Do not routinely use an iodine preparation. Iodine may contaminate specimens for certain chemistry tests.
  2. Allow the puncture site to air dry after swabbing, or dry the site with gauze. If alcohol is not allowed to dry, it may cause specimen hemolysis. If the arm is dry, you will avoid stinging the patient at venipuncture.
  3. Break the paper seal on the needle cap in the presence of that patient, and remove the needle cap. Visually inspect the point of the needle for burrs and possible discoloration along the shaft of the needle before using the needle. If it has burrs or discoloration, do not use that needle; use another sterile needle.
  4. Anchor the vein. Enter the vein with the needle at an angle of approximately 15 to 30 degrees.

Considerations for Single and Multiple Sample Collection. If only a single collection tube is required, when the vacuum is exhausted and the tube completely filled, release the tourniquet, and remove the tube from the needle assembly. Place a piece of dry gauze over the needle and withdraw the needle carefully.

needle inserted

Figure 5

When multiple specimens are required, remove the first collection tube from the holder as soon as blood flow ceases, invert the first tube to prevent clotting, and gently insert the second tube into the holder. Puncture the diaphragm of the stopper by pushing the tube forward and initiating vacuum suction. (See Figure 5.) Remove and invert each successive tube after it is filled. When all samples have been drawn, remove the entire assembly from the arm. Firmly lock the safety shield on the needle; confirm that it has locked both visually and audibly. Dispose of the used needle and holder in a sharps container according to the provisions in your exposure control plan. Do not recap, cut, or bend any needles; dispose of them in a sharps container. Do not reuse needles.

  1. Apply direct pressure to the puncture site. After drawing blood, observe proper venipuncture techniques to prevent continued bleeding and/or hematoma. Excessive bleeding (longer than five minutes) should be brought to the attention of the physician. Also, a clot tube (eg, red-top tube or gel-barrier) that does not clot should be brought to the attention of the physician.

Note: When multiple specimens are drawn from a single venipuncture, the following order is recommended: (1) sterile blood culture tubes, (2) nonadditive clotting tubes (red), (3) coagulation tubes and tubes containing citrate (blue), (4) gel-barrier tubes and tubes with additives (red), (5) tubes containing heparin (green), (6) tubes containing EDTA (lavender, royal blue), (7) tubes containing acid citrate dextrose (yellow), and (8) tubes containing sodium fluoride and potassium oxalate (gray).

Note: If the blood has to be mixed with an additive (gently invert the tube 4 to 10 times depending on the specimen tube being used), this must be done immediately after collection. You can do this quickly while the patient's arm is elevated. Mix blood with anticoagulant thoroughly, using a rolling wrist motion and by inverting the tube gently 4 or 10 times. (See Figure 6.) As soon as possible after collection, set the blood upright in a test tube rack.

test tube

Figure 6

tube label

Figure 7

  1. Label tubes in front of the patient immediately after collection, confirming all necessary information with the patient. (See Figure 7.)
  2. If blood is drawn for routine hematology, prepare the blood films (blood smears) immediately after collection.
  3. Complete the test request form to indicate time and date of collection along with collector's identification.

Note: Labcorp works with health care providers to minimize the total volume collected from pediatric and geriatric patients.

Syringe Transfer Technique in Venipuncture

A syringe is usually used with patients who are difficult to collect by routine venipuncture procedure, including techniques using a safety-winged blood collection set (butterfly). With the syringe technique, venipuncture is accomplished without direct connection to the collection tube. Follow these steps:

  1. Use disposable plastic syringes and safety straight needles or a safety-winged blood collection set. For most laboratory specimens, using 20 mL plastic syringes will allow the withdrawal of adequate specimen. Generally, the needle should not be smaller than 21-gauge.
  2. If glass syringes are used, it is essential that the barrel and plunger be absolutely dry. Small amounts of moisture can cause hemolysis. If the glass syringe has been autoclaved, it should be oven dried before use. Air drying techniques are usually not satisfactory.
  3. After the blood is collected by syringe, activate the safety feature of the safety straight needle or safety winged blood collection set. Dispose of the used needle in a sharps container according to the provisions of your exposure control plan, and fill the vacuum tubes according to the provisions of your exposure control plan. Use blood transfer device to fill tubes from syringe.
  4. Do not force blood into the tube by pushing the plunger; this can cause hemolysis and may disrupt the ratio of specimen to anticoagulant.

Blood Specimen Preparation Procedures

There are two important guidelines to follow when submitting blood specimens. For some tests, such as chemistry procedures, fasting samples are often the specimen of choice. Also, because hemolysis interferes with many procedures, please submit samples that are as free from hemolysis as possible.

Preparing Serum

Serum Preparation From Red-top Tube. Follow the steps below when preparing a serum specimen for submission. Be sure to use the centrifuge that Labcorp has provided for your use in these separations. For additional information regarding preparation of serum samples, view the following video: 

1. Draw whole blood in an amount 2½ times the required volume of serum so that a sufficient amount of serum can be obtained. The 8.5 mL red-top tube will yield approximately 3.5 mL serum after clotting and centrifuging. Label the specimen appropriately (see Specimen Containers).

2. Place the collection tube in the upright position in the rack, and allow the blood to clot at room temperature for 30 to 60 minutes.  If clotting fails to occur within 60 minutes, notify the physician. Do not remove the tube stopper.

Figure 8

3. After allowing clot to form, insert the tube in the centrifuge, stopper end up. (See Figure 8.) Operate the centrifuge for no more than 10 minutes at the speed recommended by the manufacturer. Prolonged centrifugation may cause hemolysis. When using a bench-top centrifuge, employ a balance tube of the same type containing an equivalent volume of water.

4. Turn the centrifuge off, if not automatic turn off, and allow it to come to a complete stop. Do not attempt to open the lid and stop by hand or brake. Remove the tube carefully without disturbing the contents. Do not spin more than 10 minutes unless otherwise specified.

5. Remove the stopper and carefully aspirate all serum from cells, using a separate disposable pipette for each tube.

Place the tip of the pipette against the side of the tube, approximately ¼ inch above the cell layer. (See Figure 9.)

Do not disturb the cell layer or carry any cells over into the pipette. If cells do enter the pipette, recentrifuge the entire specimen.

Figure 9

Figure 10

8. Transfer the serum from the pipette into the transport tube. (See Figure 10.) Inspect the serum for signs of hemolysis and turbidity by holding it up to the light. Be sure to provide the laboratory with the amount of serum specified.

9. Label the tube carefully and clearly with all pertinent information or bar code. Unless otherwise indicated, serum samples may be sent at room temperature. When multiple tests requiring frozen serum are ordered, a plastic transport tube should be prepared for each test.

Blood Collection / Transport Containers​

Frozen Serum. When frozen serum is required, place the plastic transport tube(s) (prepared above) immediately in the freezer compartment of the refrigerator. At the time of specimen pickup, inform your professional service representative that you have a frozen specimen to be picked up. A separate frozen sample must be submitted for each test requiring a frozen specimen. A frozen specimen should be held in a freezer at 0°C to -20°C unless a specific test requires the specimen to be frozen at -70°C (dry ice).

  1. If you have after-hours pickup for frozen specimens, label the tube with a permanent marker. (Water-soluble markers may wash off with freezing and transport.) Place the tube(s) in a designated freezer. Prepare the silver gel packs that fit into the Frozen Specimen Keeper by making sure that they also are frozen. As late as possible before the lockbox is to be put out, place the frozen transport tube in the Frozen Specimen Keeper between the silver frozen gel packs. These containers can keep frozen specimens frozen, but they will not be able to freeze specimens at room temperature or refrigerated specimens.  Refer to the Frozen Specimen Keeper instructions for use for further details.
  2. Put the Frozen Specimen Keeper containing the specimens in your lockbox according to the pictorial instructions provided (see link above). Your professional services representative will transfer the transport tube from the Frozen Specimen Keeper to dry ice for transport. The Frozen Specimen Keeper will be left in your lockbox for reuse. Specimens for multiple tests should be frozen into different transport tubes.

Note: Some lock boxes may be too small to hold the Frozen Specimen Keeper.  The original Transpak containers can be used for these lock boxes. 

Frozen Gel Packs. To ensure specimen integrity during warm weather, follow these Instructions for Use of frozen gel packs and specimen lockboxes.

Gel-barrier Tubes. Gel-barrier (mottled red/gray, gold, or cherry red-top) tubes contain clot activator and gel for separating serum from cells but include no anticoagulant. Adhere to the following steps when using a gel-barrier tube. Do not use gel-barrier tubes to submit specimens for therapeutic drug monitoring, direct Coombs', blood group, and blood types. There are other times when gel-barrier tubes should not be used. Always consult the test description and AccuDraw® prior to collection.

  1. Draw whole blood in an amount 2½ times the required volume of serum so that a sufficient amount of serum can be obtained. The 8.5 mL red-top tube will yield approximately 3.5 mL serum after clotting and centrifuging. Label the specimen appropriately.
  2. Gently invert the gel-barrier tube five times to mix the clot activator and blood.
  3. Place the collection tube in the upright position in the rack, and allow the blood to clot at room temperature for 30 to 60 minutes. (Minimum clotting time is 30 minutes for patients with an intact clotting process.)
  4. After allowing the clot to form, insert the tube in the centrifuge, stopper end up. Operate the centrifuge for 10 minutes at the speed recommended by the manufacturer. Prolonged centrifugation may cause hemolysis. When using a bench-top centrifuge, employ a balance tube of the same type containing an equivalent volume of water. Do not exceed 10 minutes of spin time unless otherwise specified.
  5. Turn the centrifuge off, if not an automatic turn off, and allow it to come to a complete stop. Do not stop it by hand or brake. Remove the tube carefully without disturbing the contents. Inspect the barrier gel to ensure that it has formed a solid seal between the serum and packed cells. Also, examine the serum for signs of hemolysis and turbidity by holding it up to the light. Be sure to provide the laboratory with the amount of serum specified.
  6. Make sure the tube is clearly labeled with all pertinent information or bar code.
  7. If a frozen specimen is not required, it is not necessary to transfer serum to a plastic transport tube. Unless otherwise indicated, serum specimens may be sent at room temperature.
  8. When frozen serum is required, transfer the serum using a pipette into a plastic transport tube. Follow the steps in Frozen Serum.

Plasma Preparation. When plasma is required, follow these steps.

1. Always use the proper vacuum tube for tests requiring a special anticoagulant (eg, EDTA, heparin, sodium citrate, etc) or preservative.

2. Tap the tube gently to release additive adhering to the tube or stopper diaphragm. (See Figure 11.)

Figure 11

3. Permit the vacuum tube to fill completely. Failure to fill the tube will cause an improper blood-to-anticoagulant ratio and yield questionable and/or QNS test results.

4. To avoid clotting, mix the blood with the anticoagulant or preservative immediately after drawing each sample.

5. To allow adequate mixing, slowly invert the tube eight to ten times (four times for citrate tubes) using a gentle wrist rotation motion.

6. Immediately centrifuge the specimen for as long as 10 minutes or as specified by the tube manufacturer. Do not remove the stopper.

7. Turn the centrifuge off, if not an automatic turn off, and allow it to come to a complete stop. Do not stop it by hand or brake. Remove the tube carefully without disturbing the contents.

8. Remove the stopper and carefully aspirate plasma, using a separate disposable Pasteur pipette for each tube.

9. Place the tip of the pipette against the side of the tube, approximately ¼ inch above the cell layer. Do not disturb the cell layer or carry any cells over into the pipette. Do not pour off; use transfer pipette.

10. Transfer the plasma from the pipette into the transport tube. Be sure to provide the laboratory with the amount of plasma specified.

11. Label all tubes clearly and carefully with all pertinent information or bar code. All tubes should be labeled with the patient's full name or identification number as it appears on the test request form or affix bar code. Also, print on the label the type of plasma submitted (eg, “Plasma, Sodium Citrate,” “Plasma, EDTA,” etc).

12. When frozen plasma is required, place plastic transport tube(s) immediately in the freezer compartment of the refrigerator, and notify your professional service representative that you have a frozen specimen to be picked up.

13. Never freeze glass tubes. For after-hours pickup, follow the steps under Frozen Serum above.

Plasma Preparation Using a Plasma Preparation Tube (PPT™)

  1. The BD Vacutainer® Plasma Preparation Tube (PPT™) is a plastic evacuated tube used for the collection of venous blood in order to prepare undiluted plasma for use in molecular diagnostic testing.
  2. The BD PPT™ should be at room temperature and properly labeled for patient identification.
  3. Collect blood into the BD PPT™ following standard procedure for venipuncture and sample collection. Permit the vacuum tube to fill completely. Failure to fill the tube will cause an improper blood-to-anticoagulant ratio and may yield questionable and/or QNS test results.
  4. To avoid clotting, gently mix the blood with the anticoagulant immediately after drawing each sample.
  5. To ensure adequate mixing, gently invert the BD PPT™ eight to ten times using a gentle wrist rotation motion.
  6. After mixing, store the BD PPT™ upright at room temperature until centrifugation. Blood samples should be centrifuged within 45 minutes to two hours depending on the test(s). Please refer to the specimen requirements for the test(s) of interest available in the Directory of Services. Centrifuge BD PPT™/blood sample at room temperature at minimal of 1100 RCF (relative centrifugal force) for a minimum of 10 minutes in a swinging bucket rotor type centrifuge. (Use of a fixed angle rotor centrifuge does not allow the gel barrier to form properly and may result in incomplete separation of plasma from the cellular components.)
  7. Allow centrifuge to come to a complete stop before attempting to remove tubes. Examine tube to ensure that the gel barrier has formed between the plasma and the cellular elements.
  8. Once centrifuged, the plasma in the BD PPT™ can be transported to the lab without transferring to another tube. The gel barrier prevents the remixing of the plasma with the cellular elements of the blood. The plastic BD PPT™ can be frozen at -80°C prior to shipment.

Blood Film (Blood Smear) Slide Preparation

The blood film (commonly called a blood smear) can be a vital part of clinical testing. When performed, it enables the technologist to view the actual physical appearance of the red and white blood cells microscopically. Well-prepared films can be used in performing the differential white cell count, for examining the morphology (size, structure, and shape) of red and white cells to determine the presence of abnormal cells, and also for the examination of the size and number of platelets. The distribution of the cells, as well as their morphology, can be altered by poor slide preparation.

The most appropriate slide consists of a film that is exactly one cell thick for maximum visualization of all cell types microscopically.

Blood films may be prepared from venous blood (venipuncture) or capillary puncture blood. Slide preparation using venous blood is described below.

Preparing Slides Using Venous Blood Collected From Venipuncture

Follow the steps outlined below.

1. Put on laboratory personal protective equipment.

2. Select two clean, grease-free glass collection slides with frosted ends (new ones whenever possible).

3. Print the patient's name and date on the frosted ends of both slides. (See Figure 12.)

Figure 12

4. Handle all slides only by the frosted ends or by the edges.

5. Place the collection slides frosted side up and to your right on a padded, flat surface near the chair or bed where the specimen is to be collected.

6. Immediately after removing the needle from the vein, gently touch the tip of the needle to one of the clean slides, producing a small drop of blood about 1 to 2 mm in diameter, about the size of a match head. The drop of blood should be in the center line, approximately ¼ inch from the frosted end. Repeat for the second collection slide. Activate the needle's safety feature and dispose of the needle in a sharps container.

7. Hold the left corners of the collection slide with the left thumb and forefinger.

8. Hold the spreader by the frosted end between the right thumb and the index finger.

9. Rest the left end of the spreader at a 45° angle, approximately ½ inch opposite the drop of blood on the slide. This angle prevents the white cells from bunching along the edges.

Figure 13

Figure 14

10. Draw the spreader slide steadily back toward the drop of blood. When the slide contacts the drop, the blood will start to spread to the edges of the spreader slide. (See Figure 13.)

11. Keep the spreader slide at a 45° angle, maintaining light but firm pressure with the spreader slide against the horizontal slide. Push the spreader slide rapidly over the entire length of the slide, pulling a thin smear of blood behind it. A feathered edge usually characterizes a good blood film. The blood should not extend past 3/4 the length of the slide. (See Figure 14.)

12. Prepare the second film in the same manner.

13. Allow the blood films to air dry. Do not blow on the slides. Do not apply fixative. After the slides are completely dry, place them in a labeled slide holder for transport to the laboratory.

Special Notes on Slide Preparation

1. Slides must not be touched on any area except the long slide edges or frosted ends.

2. Prepare the film immediately, as soon as the drop of blood has been placed on the slide. Any delay will result in abnormal distribution of the white cells, with many of the larger white cells accumulating at the thin edge of the smear. Rouleaux of the red cells (stacking like piles of coins) and platelet clumping will also occur.

3. Criteria:

  • The thin portion should be about 1 inch long, and the entire film should cover approximately half of the area of the entire slide.
  • No portion of the film should extend to the edges of the slide.
  • The film should be free of waves, holes, and ridges, and it should have a smooth appearance and feathered edge.
  • All microscopic slides, as well as paraffin blocks, should be clearly labeled using two patient identifiers.
  • The accession designation used in the pathology report should include the case type, year, and a unique accession number.

4. Common causes of a poor blood film. (See Figure 15.)

Figure 15

  • Too long a delay in transferring the drop of fresh blood from collection tube to slide.
  • Drop of blood too large or too small (usually too large).
  • Spreader slide pushed across the slide in a jerky manner.
  • Greasy or dirty slides, or use of a spreader slide with a chipped or unpolished end.
  • Failure to keep the entire edge of the spreader slide against the slide while making the film.
  • Failure to keep or have the spreader slide at approximately a 45° angle. (Increasing the angle results in a thick film, while a smaller angle will produce a thin film.)
  • Failure to push the spreader slide completely across the flat slide.

Blood Culture

Blood cultures should be collected directly into the blood culture bottles provided by Labcorp. Please follow the instructions that come with the kit and call your Labcorp representative if you have any questions. You can also go the test description for Blood Culture, Routine [008300] in Labcorp's online directory and refer to the Microbiology Specimen Collection and Transport Guide attached in the Related Documents field for additional information on blood culture specimen collection.

Provider?

Please login to Labcorp Link to pay your bill.

Provider Login